Using Futrli Advisor's non-financial importer, you can upload data into Futrli Advisor from any source. Once uploaded, you can then report on that data, use it to construct basic or advanced KPIs, or as part of your forecast projections. In this guide, we’re going to talk through the basics of uploading non-financial data.
- - - - - -
Step one
First, navigate to the Organisations section. This is the area of Futrli Advisor where you’ll find a list of the organisations you have access to. Adjacent to each organisation you’ll find a button entitled Settings. Clicking this exposes further information on the organisation and additional options:

Step two
You’ll now find yourself on the organisation’s chart of accounts tab which is where you can view the organisation’s chart of accounts and, in the case of manual organisations, edit it.
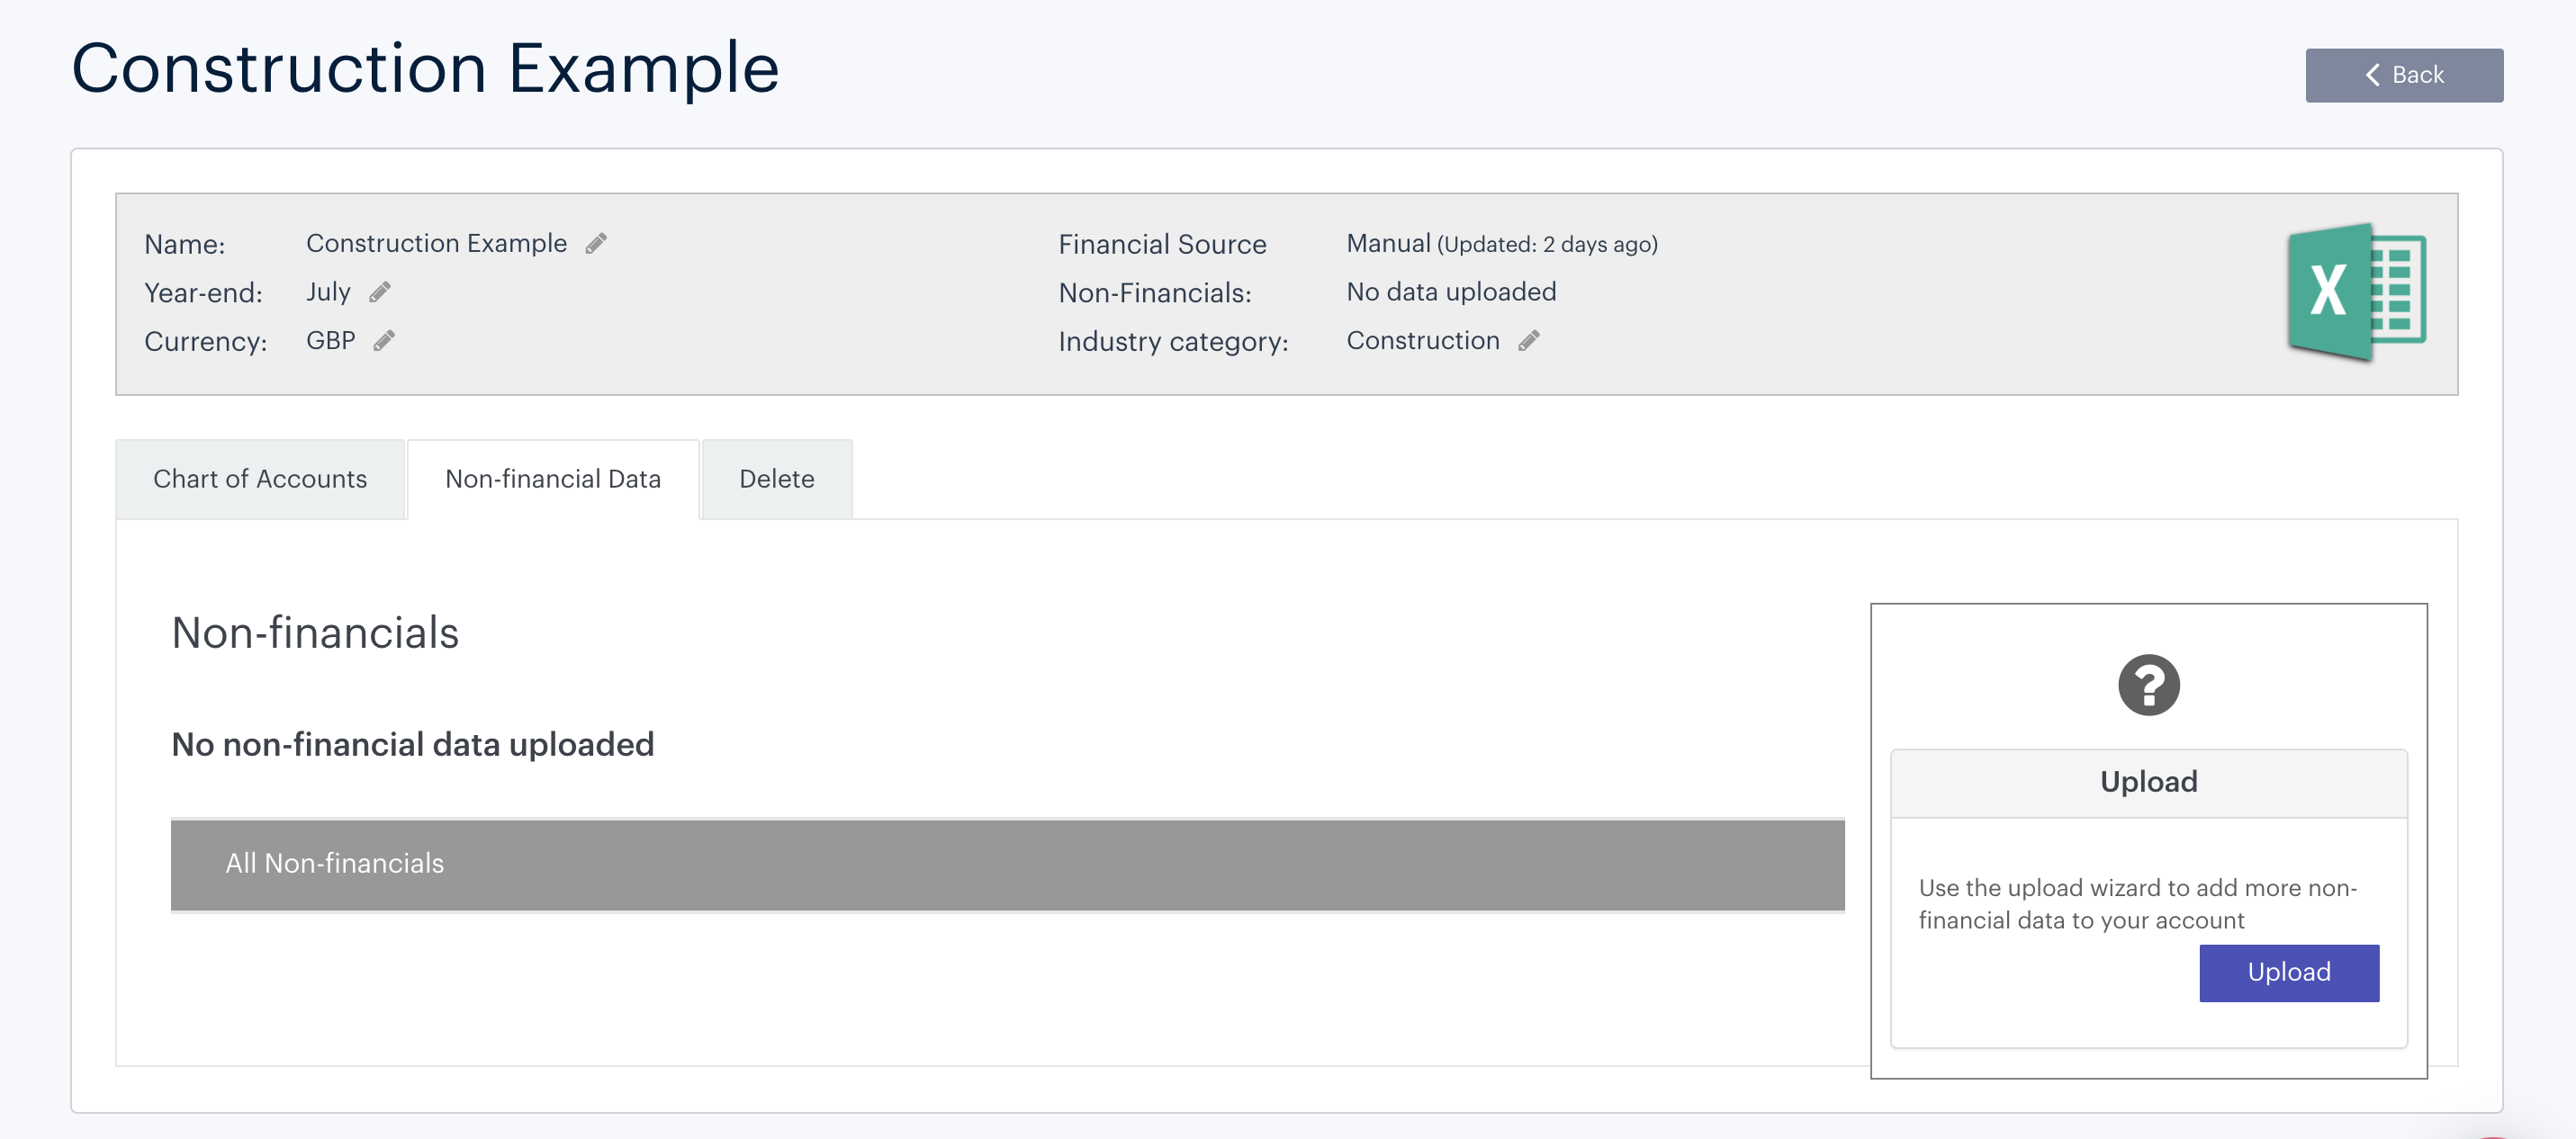
The non-financial data tab is where you can upload new and download or delete existing non-financial data. Select the non-financial tab.
Step three
Once you’ve uploaded non-financial data you’ll find it listed here, from where it can be deleted or downloaded. To add new data select Upload:
Step four
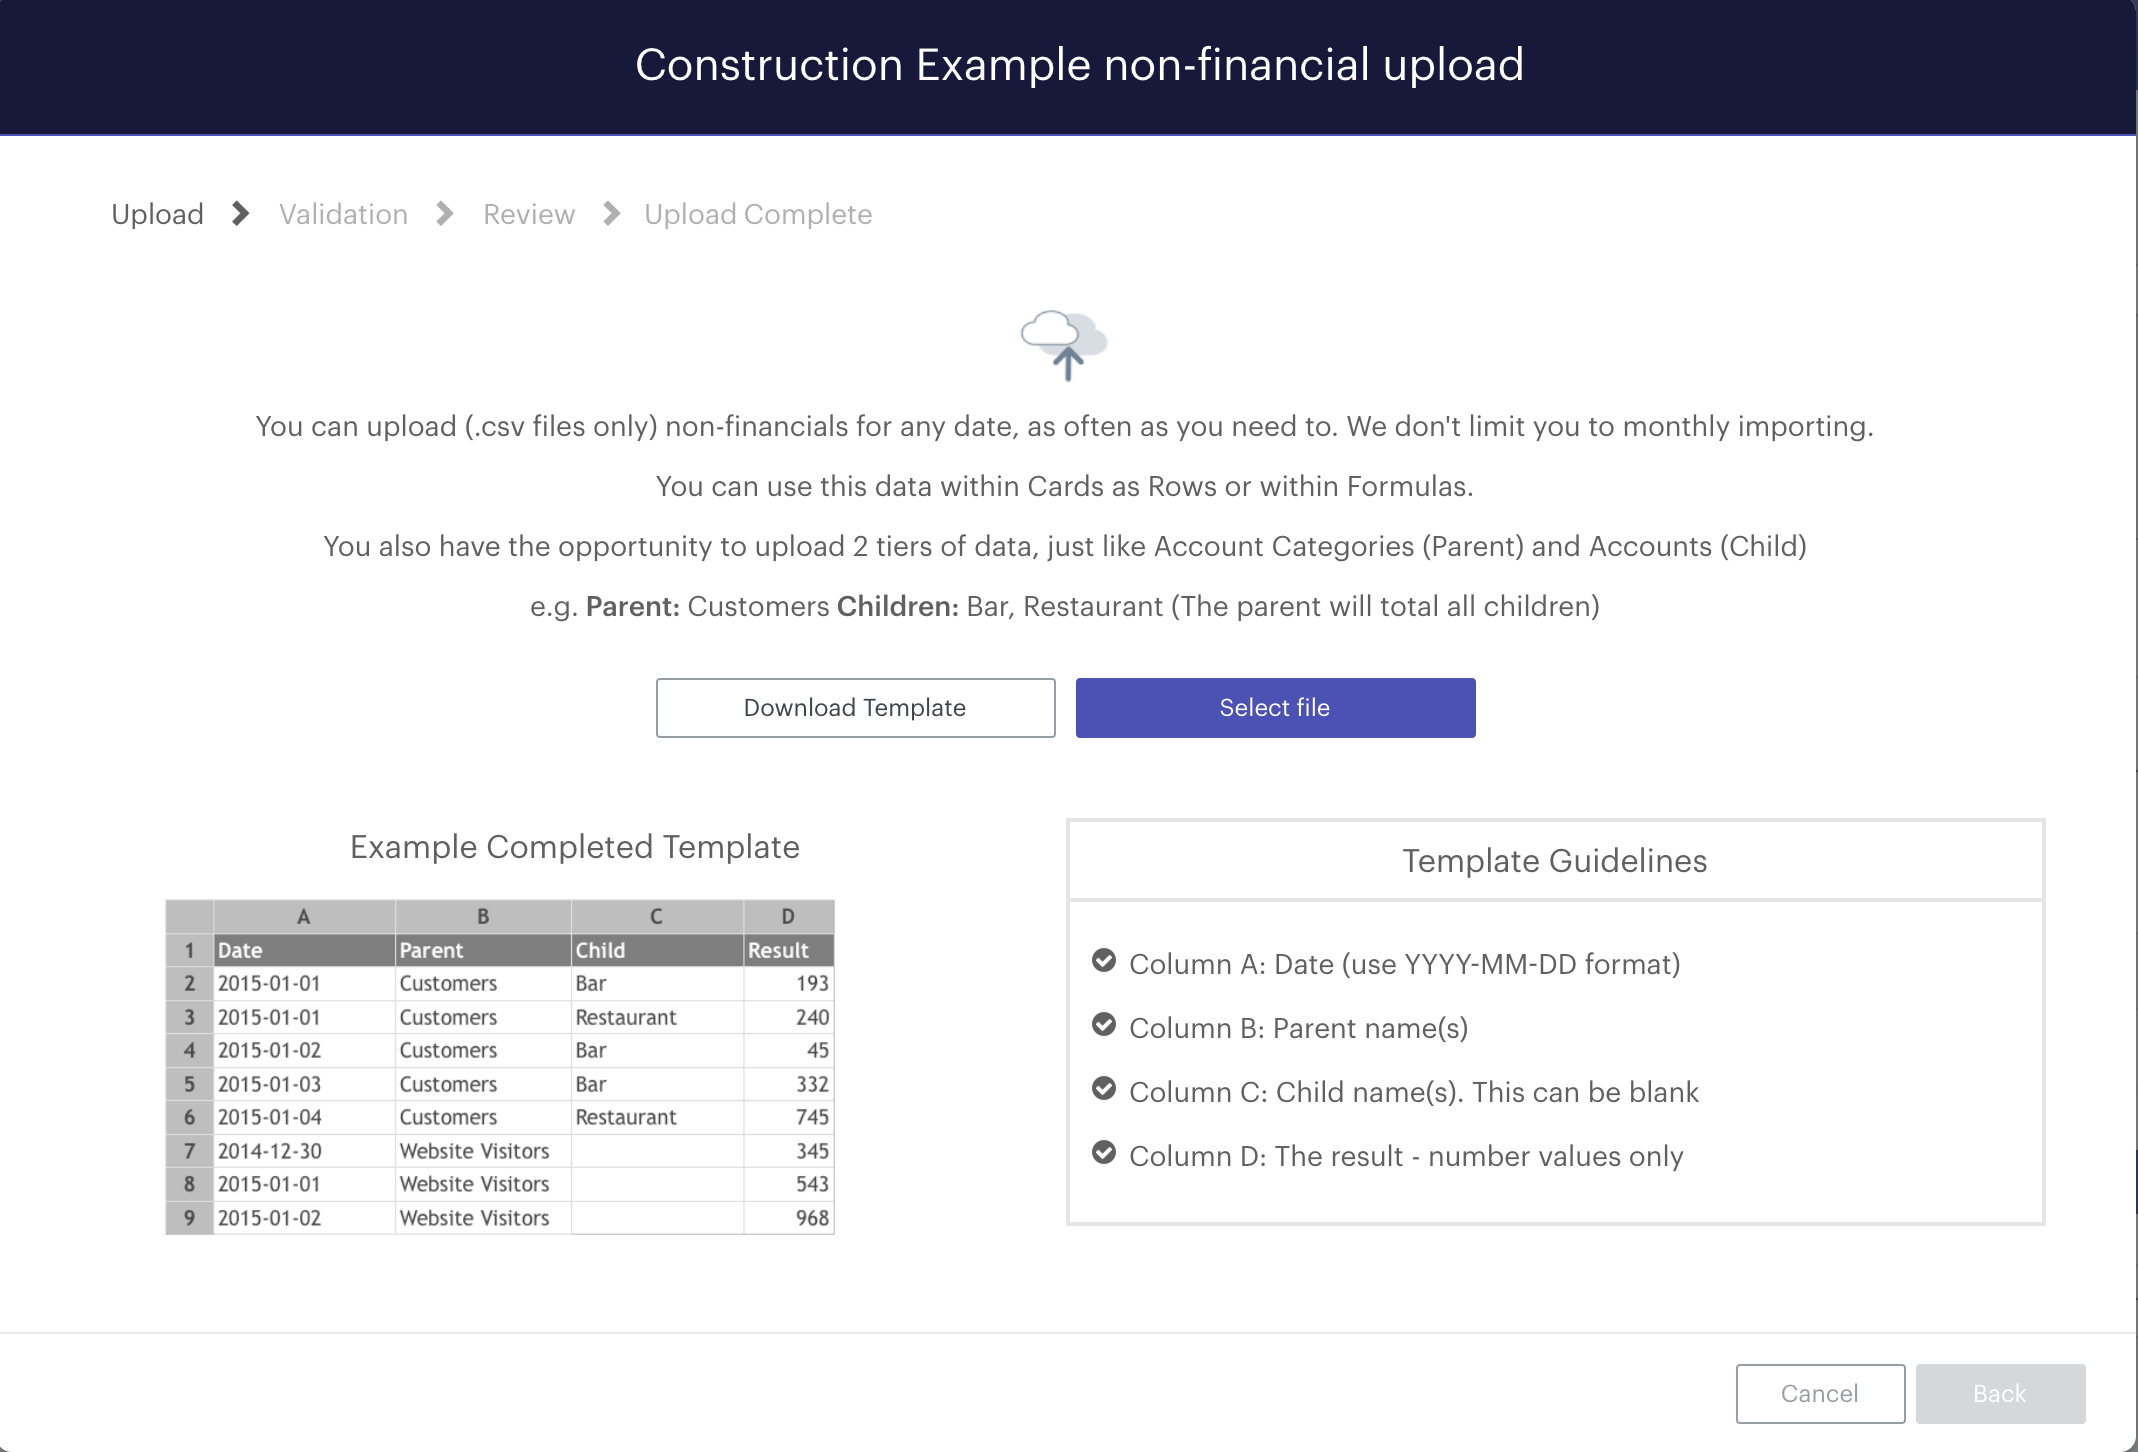
Selecting Upload will load the non-financial upload wizard. Here you’ll find an overview of our upload format, as well as the option to download an example template. We would recommend you do so on your first upload in order to ensure that your data is formatted correctly.
To the right of the download template button you’ll find the option to Select file. Clicking this will allow you to select the file you wish to upload. We’ll be coming back to that later:
Step five
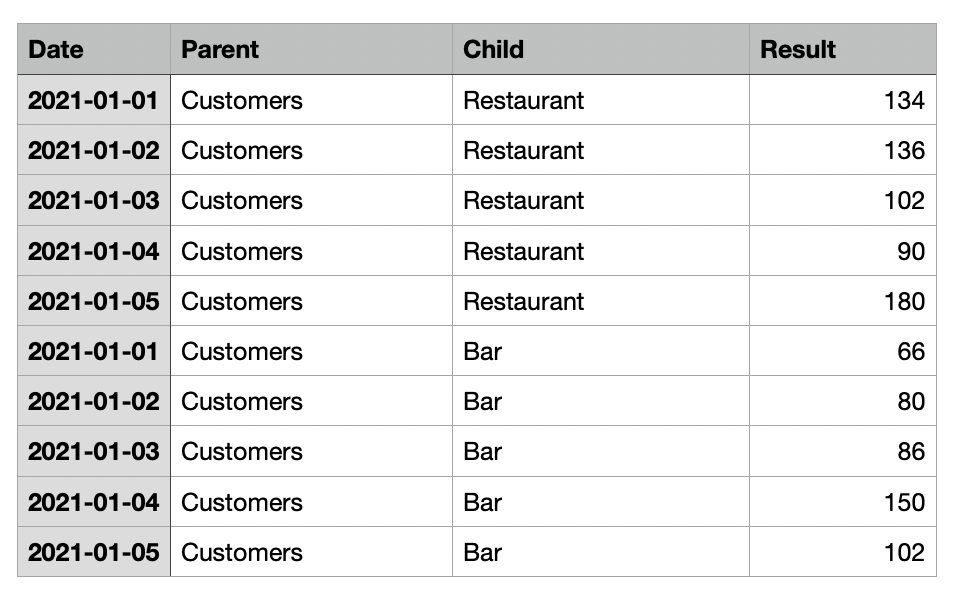
In this example, we’re going to be uploading customer data for five days in January. To do so, we need to ensure that our uploaded data conforms to Futrli's Date/Parent/Child/Result formatting.
First comes the Date field. These should be entered YYYY-MM-DD, so when we put 2021-01-01, we’re actually saying January the 1st 2021.
Next we have the Parent field. This is the group, title or main header of our data. As we’re uploading our number of customers for a period, we’ve entered this as Customers. In our Child field we can differentiate further, think of this as a sub-group within our main grouping.
Whatever we put here will total to form the value of our customers line. In this example we’ve entered Restaurant and Bar. Finally in our Results field we enter the number of customers for each day. When you’re happy with your file, export it to CSV:
Step six
Back in Futrli, click the Select File button and select your CSV. This will upload it into Futrli. If there are any errors with your file they will display at this point:

Step seven
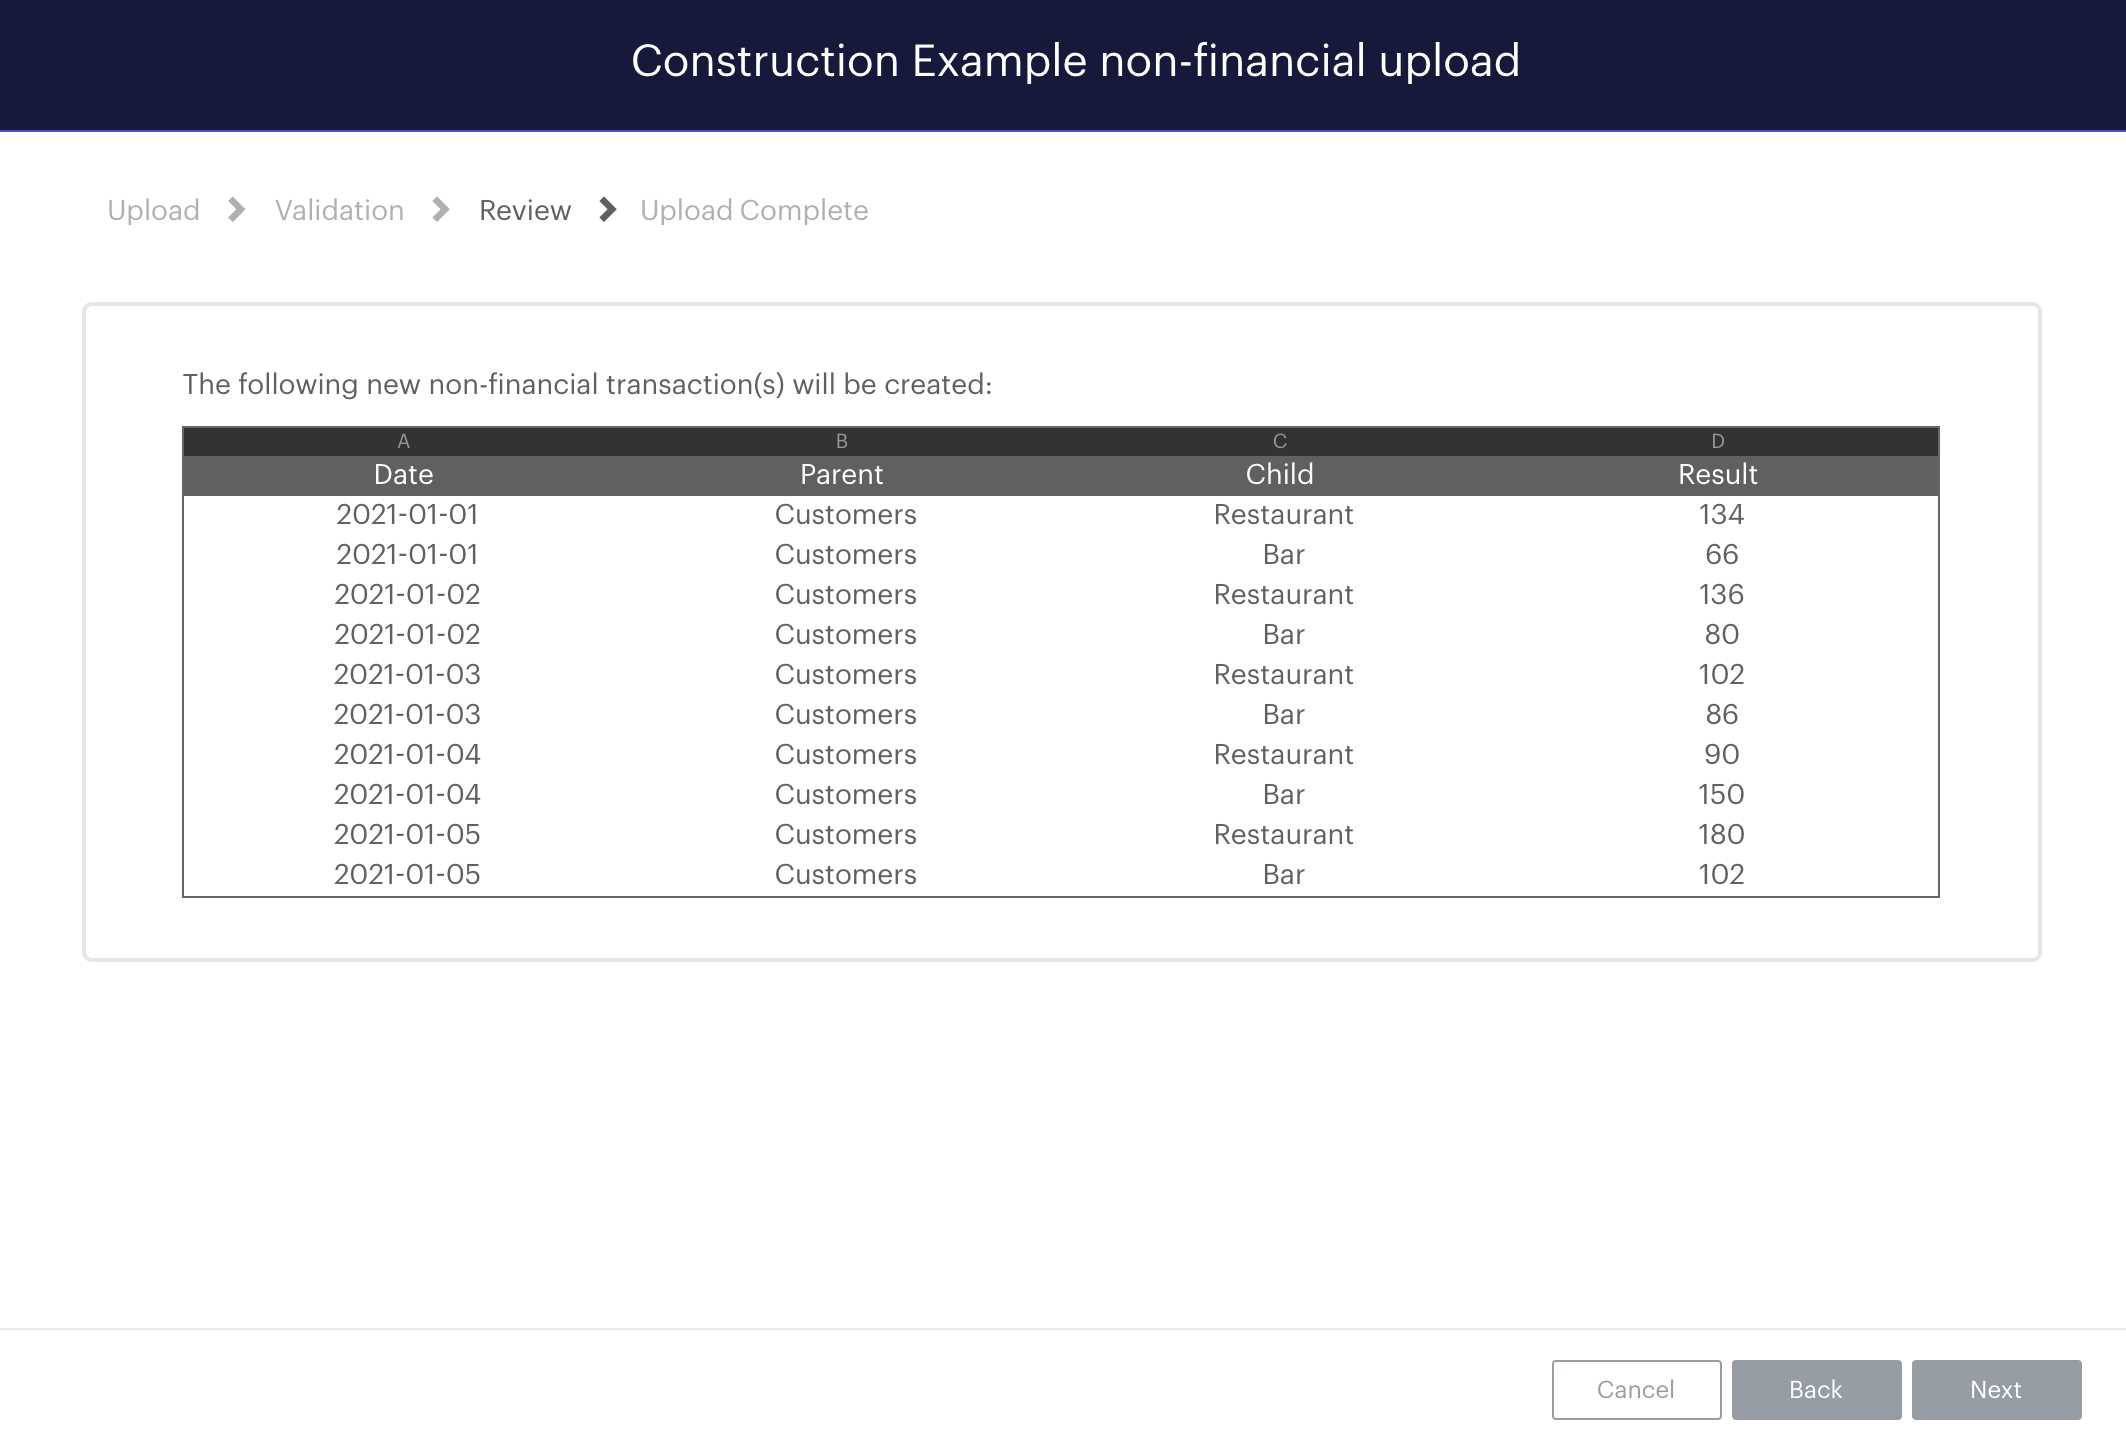
Click next to review the data you’re uploading into the system. Once you’re happy, click Next again and then Finish to complete your upload:
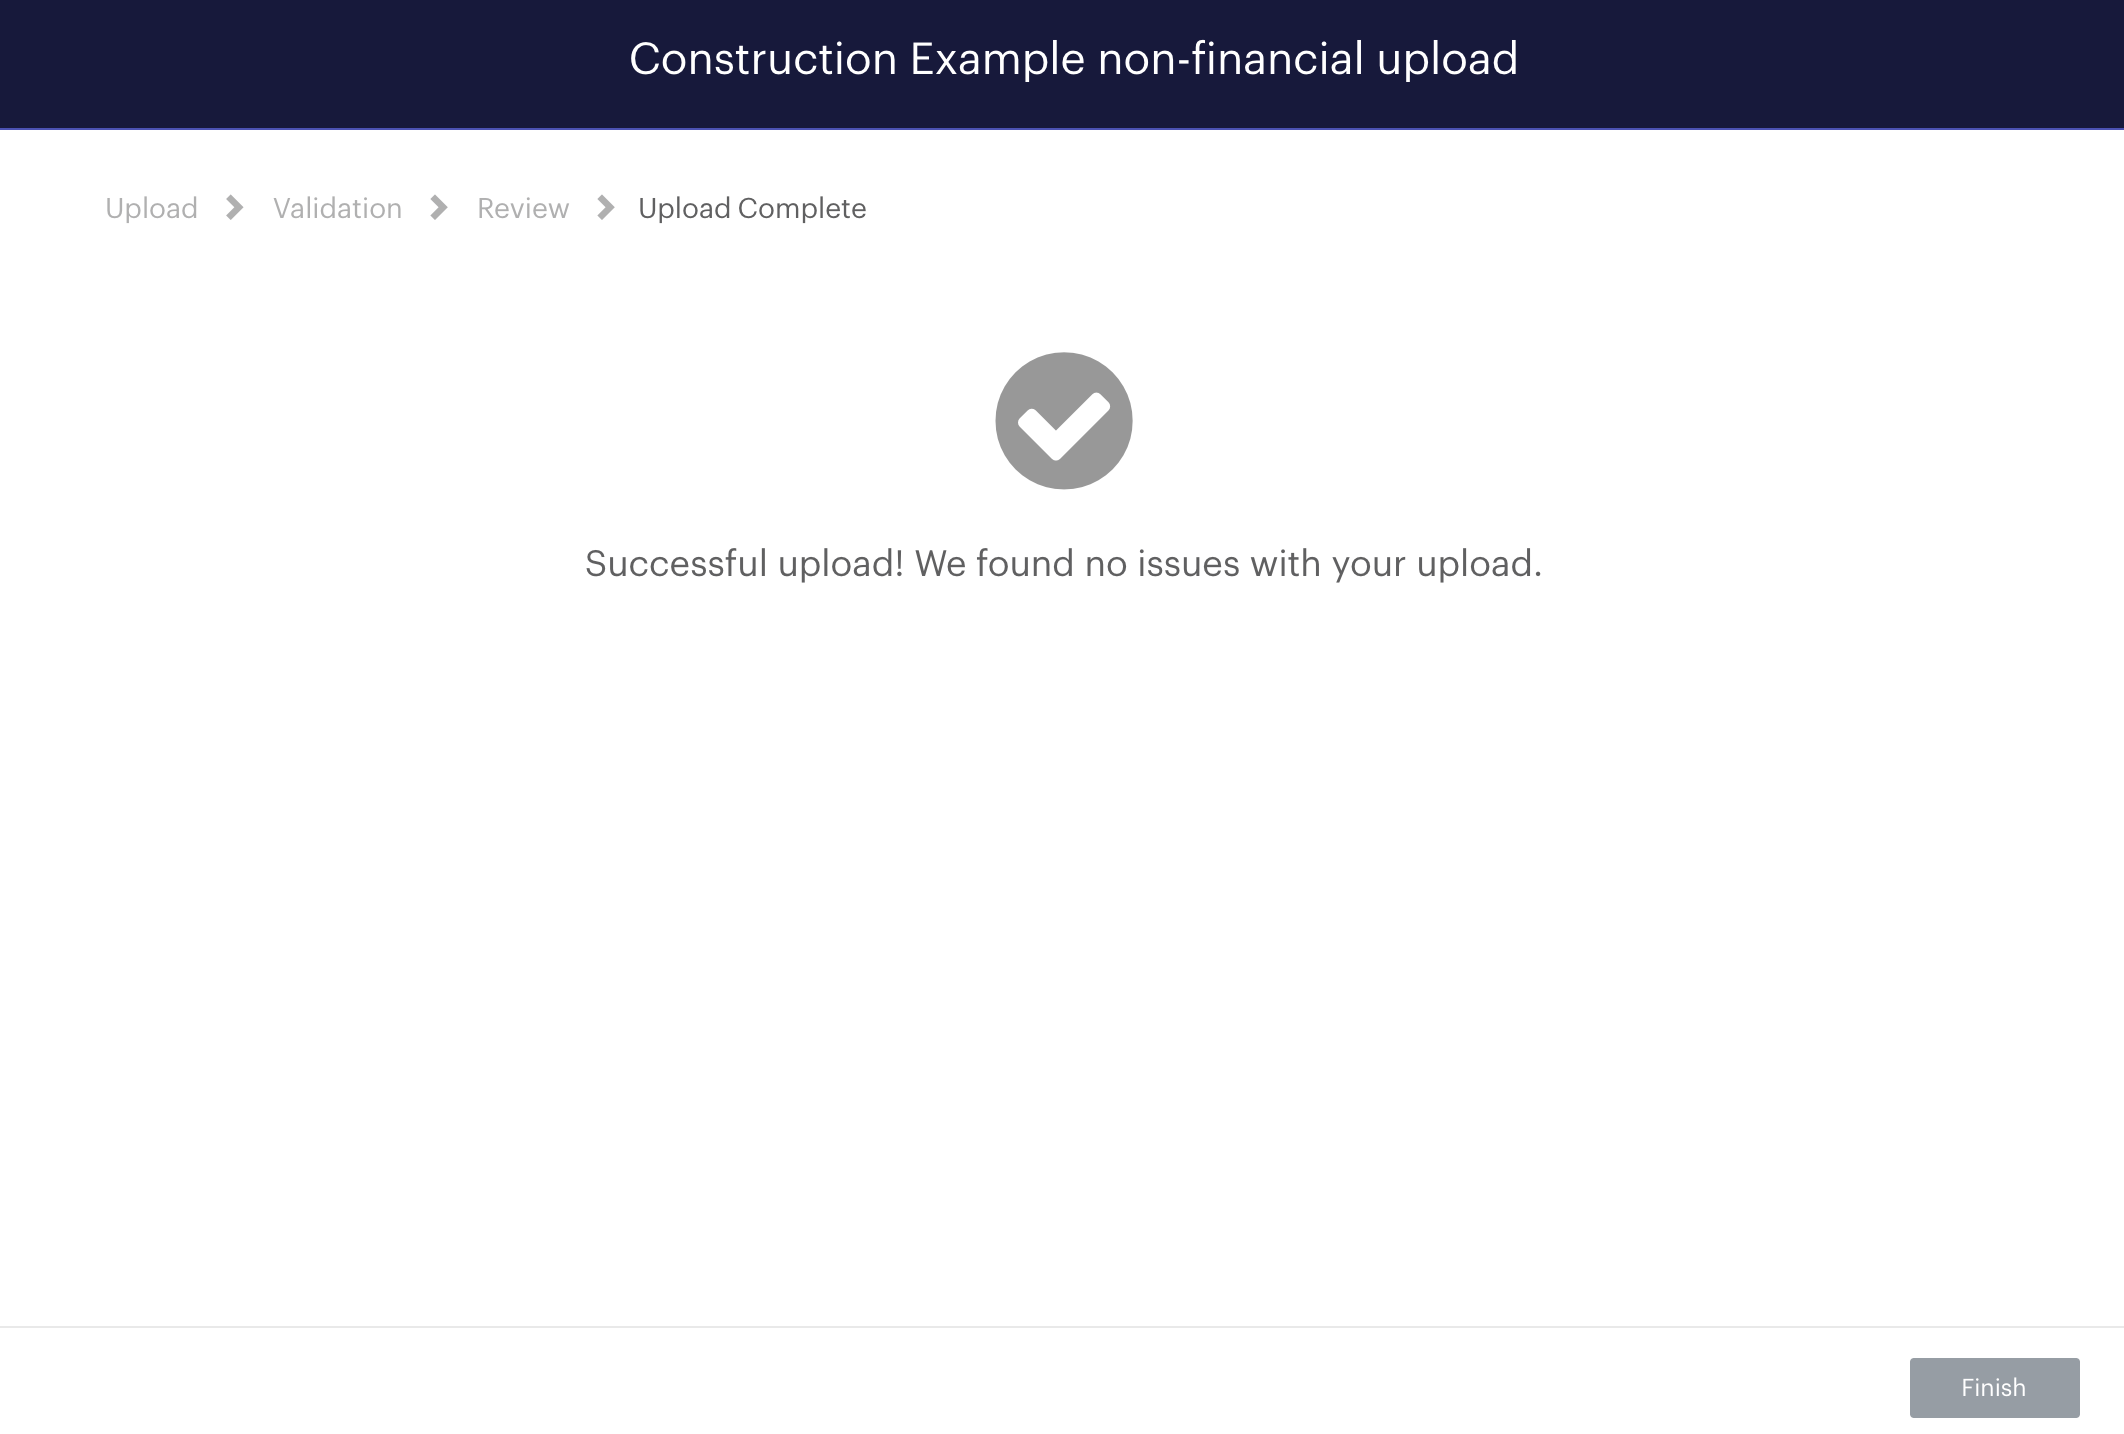
Step eight
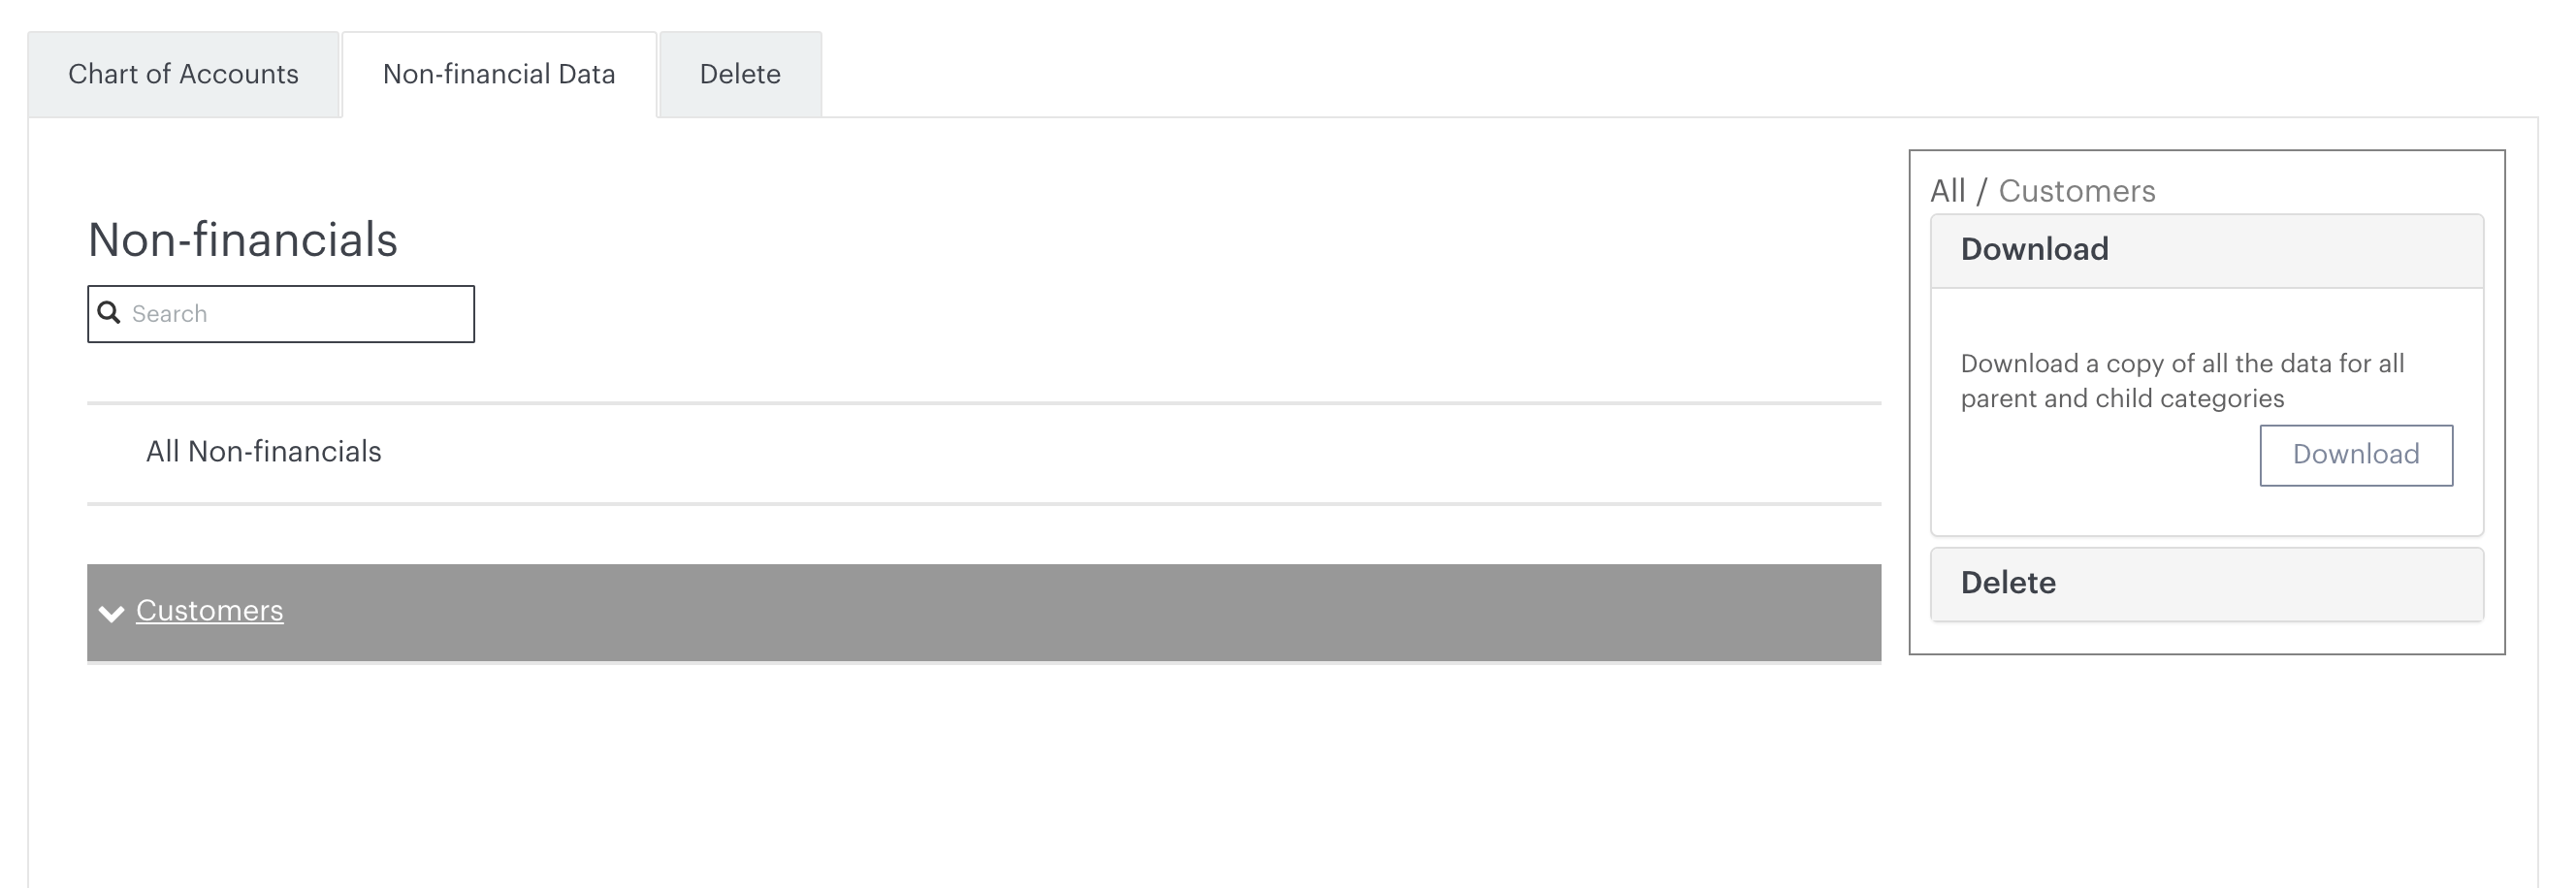
Once you click Finish, you will be redirected back to the non-financial data tab of your chosen organisation, within the settings area. Here you will be able to see your newly uploaded non-financial data. So in this example, we have Customers:
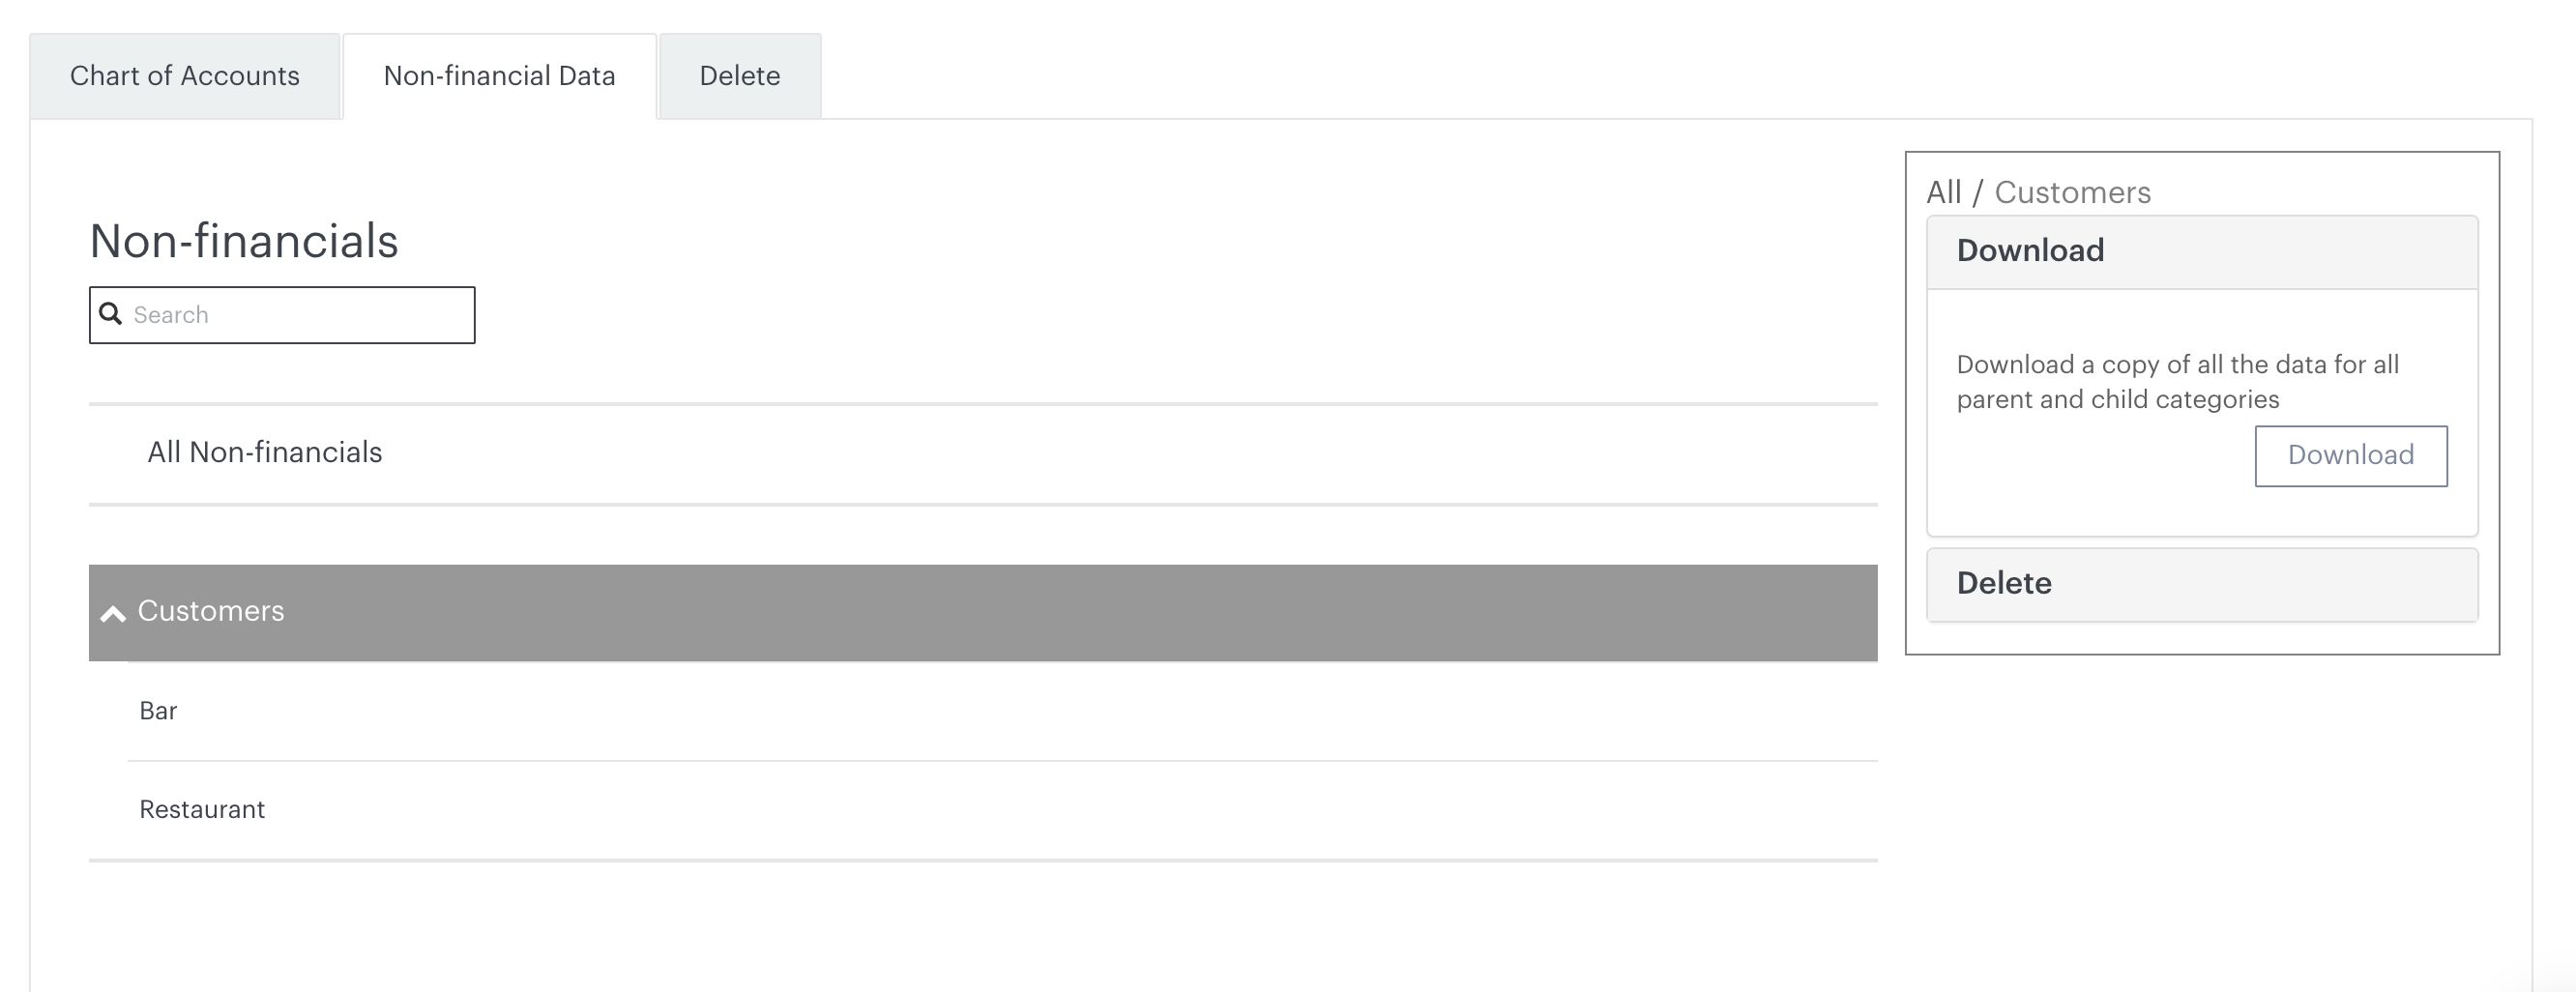
By clicking the drop-down beside the parent category, you can view the child categories, which in this example are Bar and Restaurant. You can also delete or download your non-financial data by selecting the menu on the right of the relevant data:
With your non-financial data uploaded you can now begin using this as part of your cards, forecasts and formulas to help you get even more granular, personalised insights.
