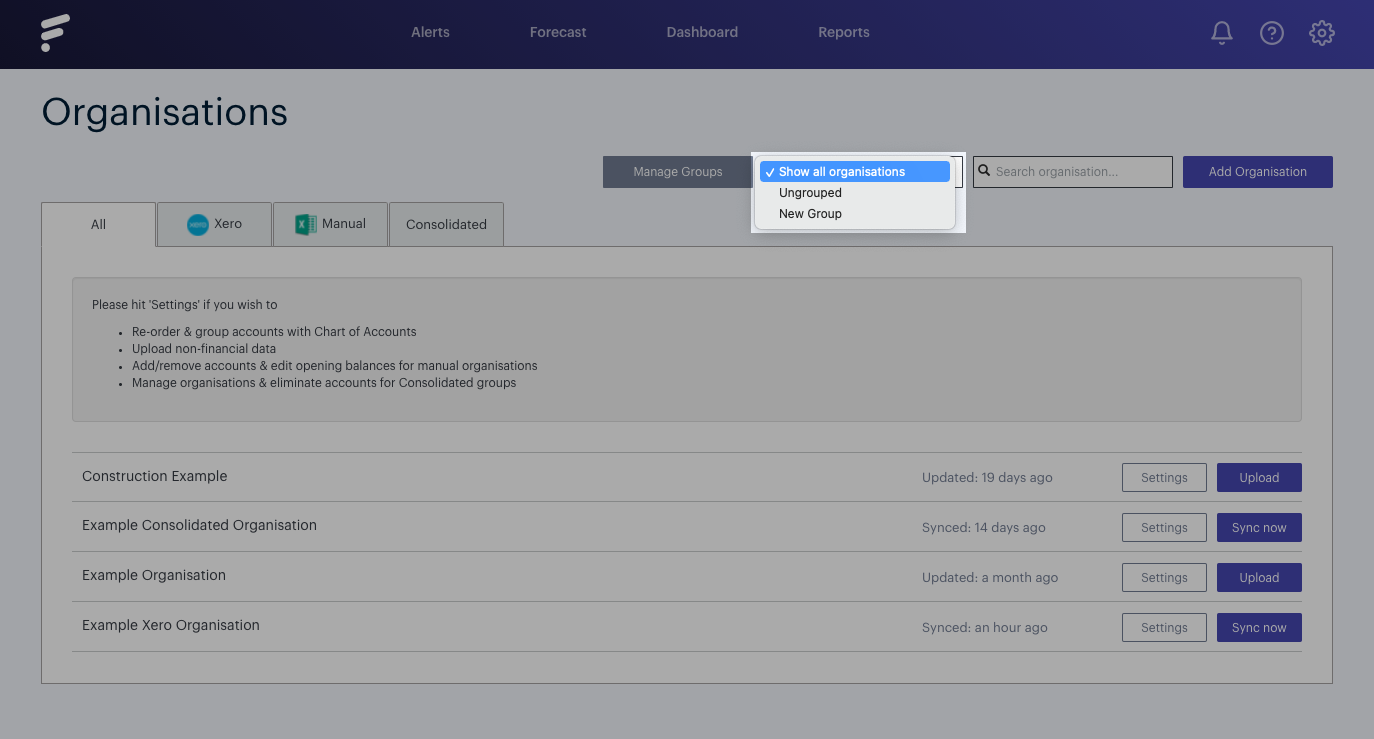
Creating a group of organisations can be a really useful way to filter what data you want to look at within your organisations.
If you are dealing with a large number of organisations, you may want to group these to make it easier to monitor the relevant data for one particular group of organisations. To do this, we can use the grouping function within organisations.
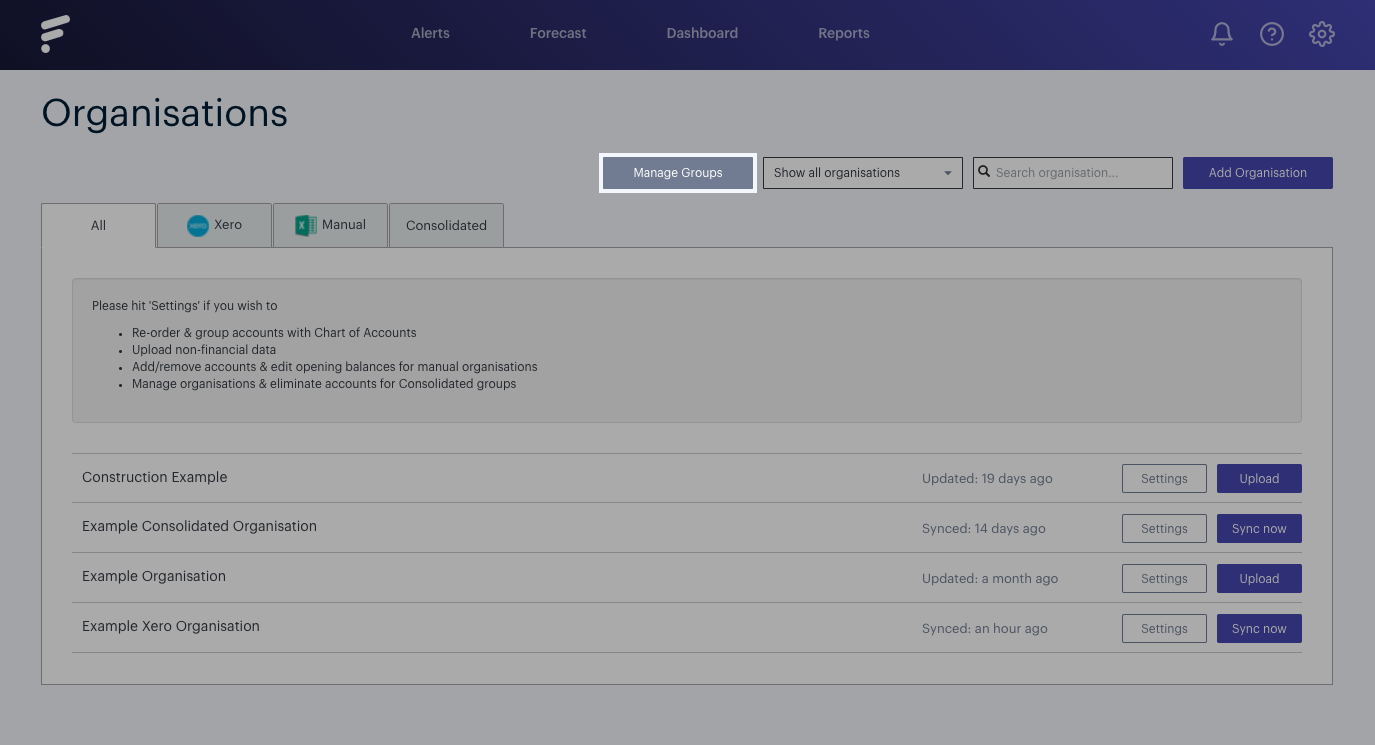
In the Organisations section of Futrli we can navigate to the Manage Groups button along the top menu of the organisation's screen:
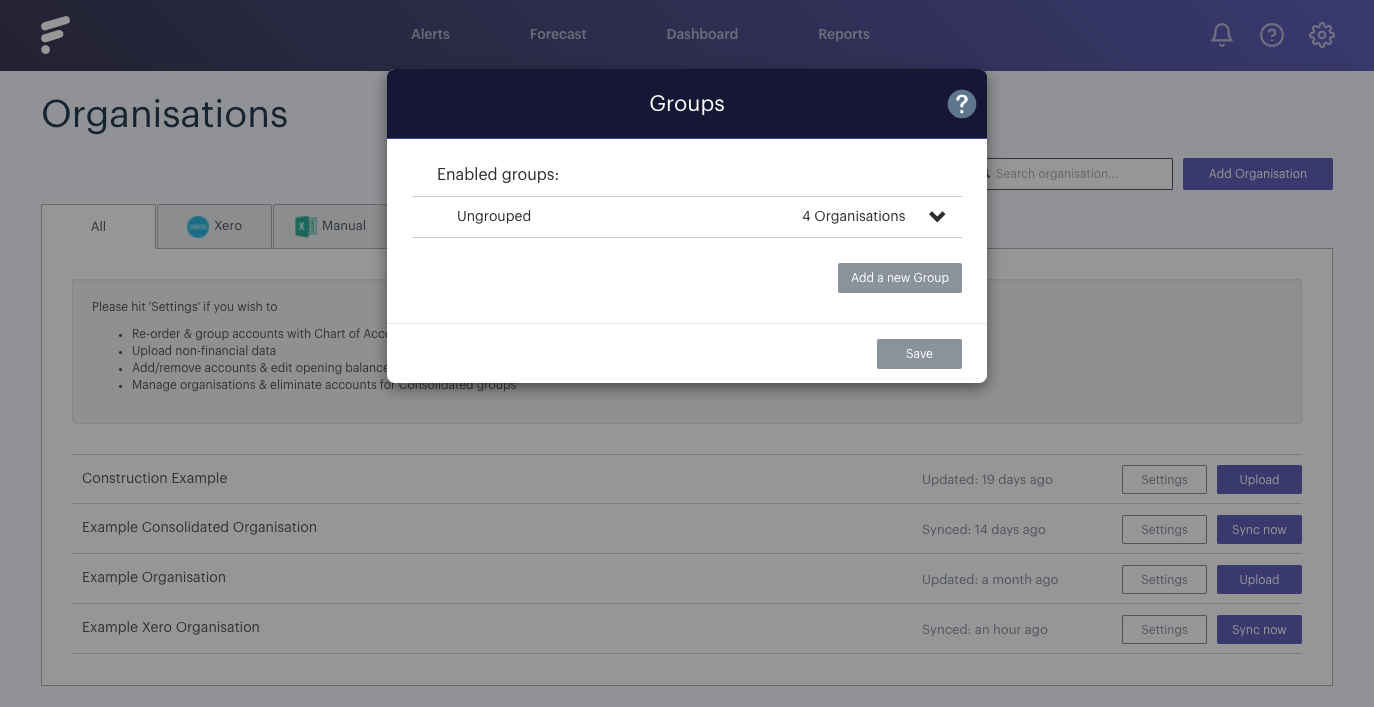
Here you'll be able to view and edit your existing groups, as well as adding new ones. For the purposes of this example, we are going to click the Add a new Group button:
As you can see this now adds a new group, which we can rename by clicking on the icon beside the existing name, and editing it as required. With your new group created and named, we can click the drop-down arrow beside the group and add (or remove in the case of existing groups) from the list below:
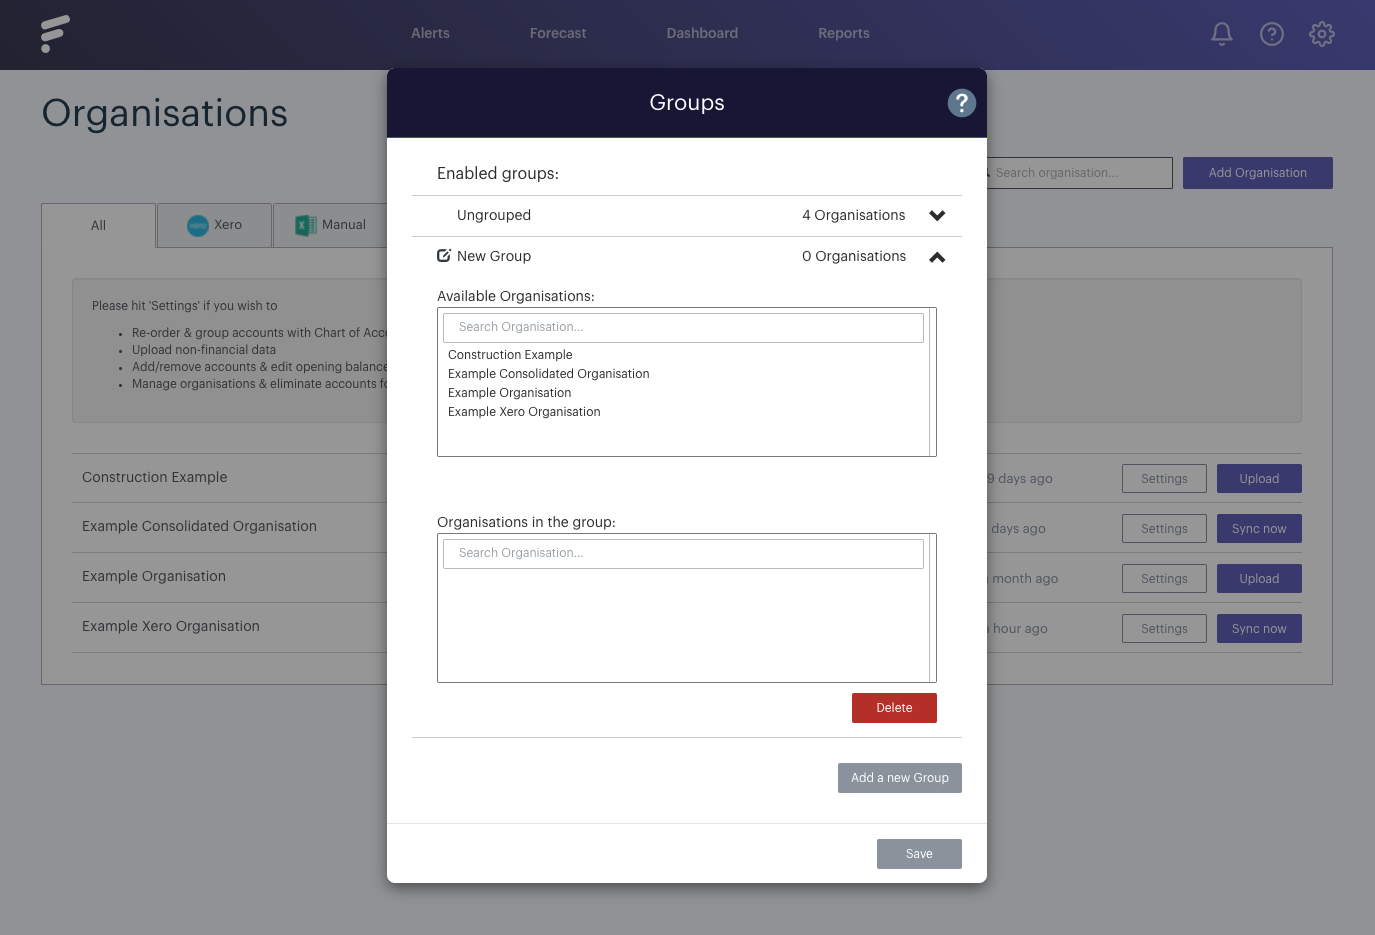
Simply clicking on the name of the organisation in the Available Organisations box will add it to the new group, and likewise clicking on an organisation in the Organisations in Group box will remove the selection from the group. You can also click Add a New Group as many times as required to create more groups as needed:
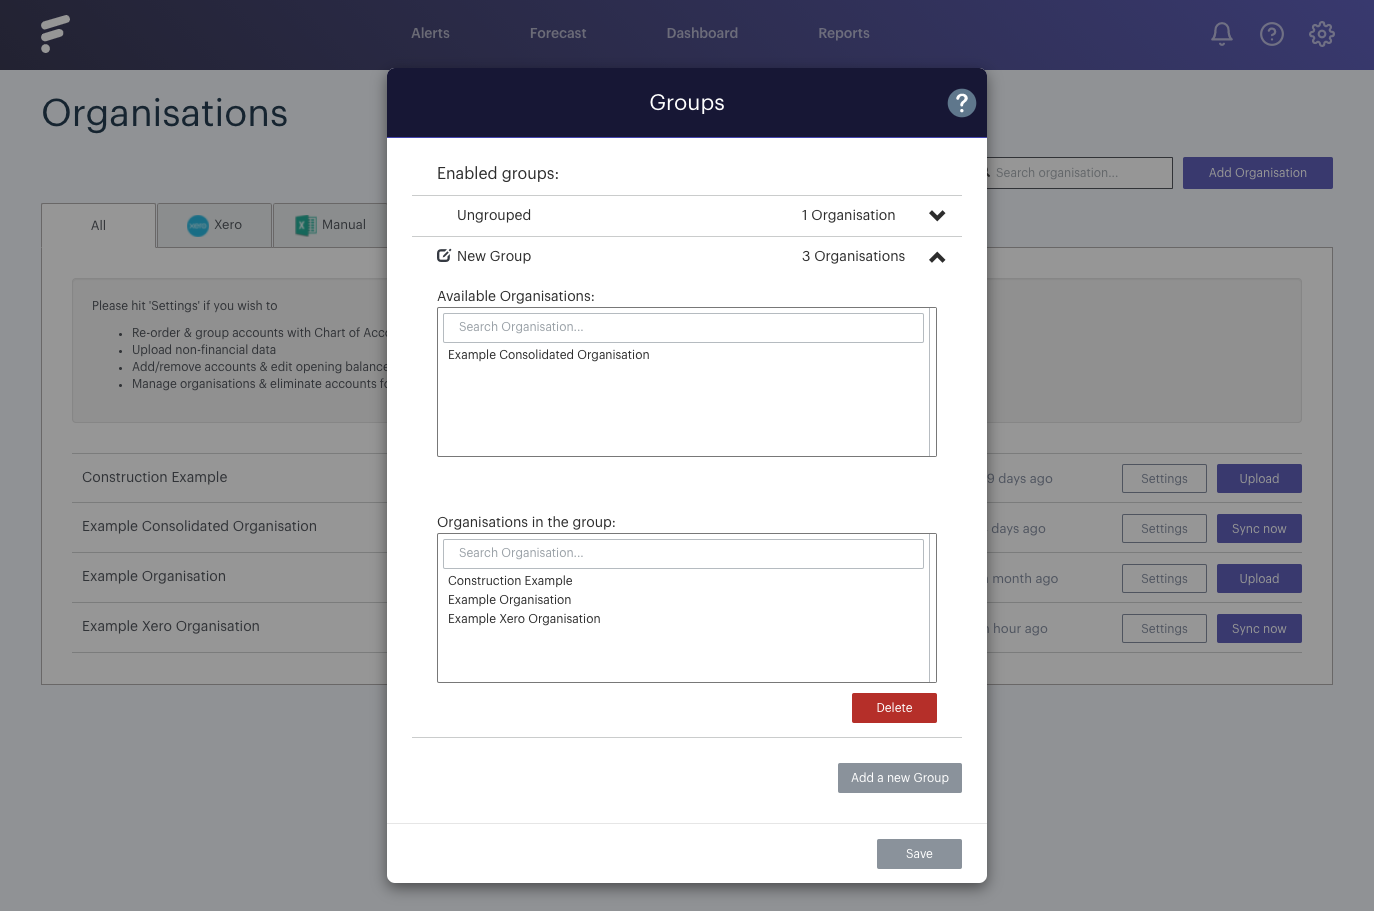
When you're happy with the groups you have created, you can click Save, which will redirect you back to the organisation's screen.
Now you can click the drop-down beside the Manage Groups button, and you can see the group you have created. By selecting the group, this will then display your group within the organisation's screen, allowing you to easily filter out ungrouped organisations, or alternative groups as you need them:
